Difference Between Modes
dploy offers three modes for both development and deployment: dev, run, and deploy.
Let's examine the differences using the following configuration example:
# dploy.toml

name = "project"
ports = [3000, 3001]
volumes = ["/app/data"]
env = ["APP_TELEGRAM_TOKEN"]

[postgres]
expose_url_to_env = "APP_POSTGRES_URL"
dev Mode
To activate dev mode, run:
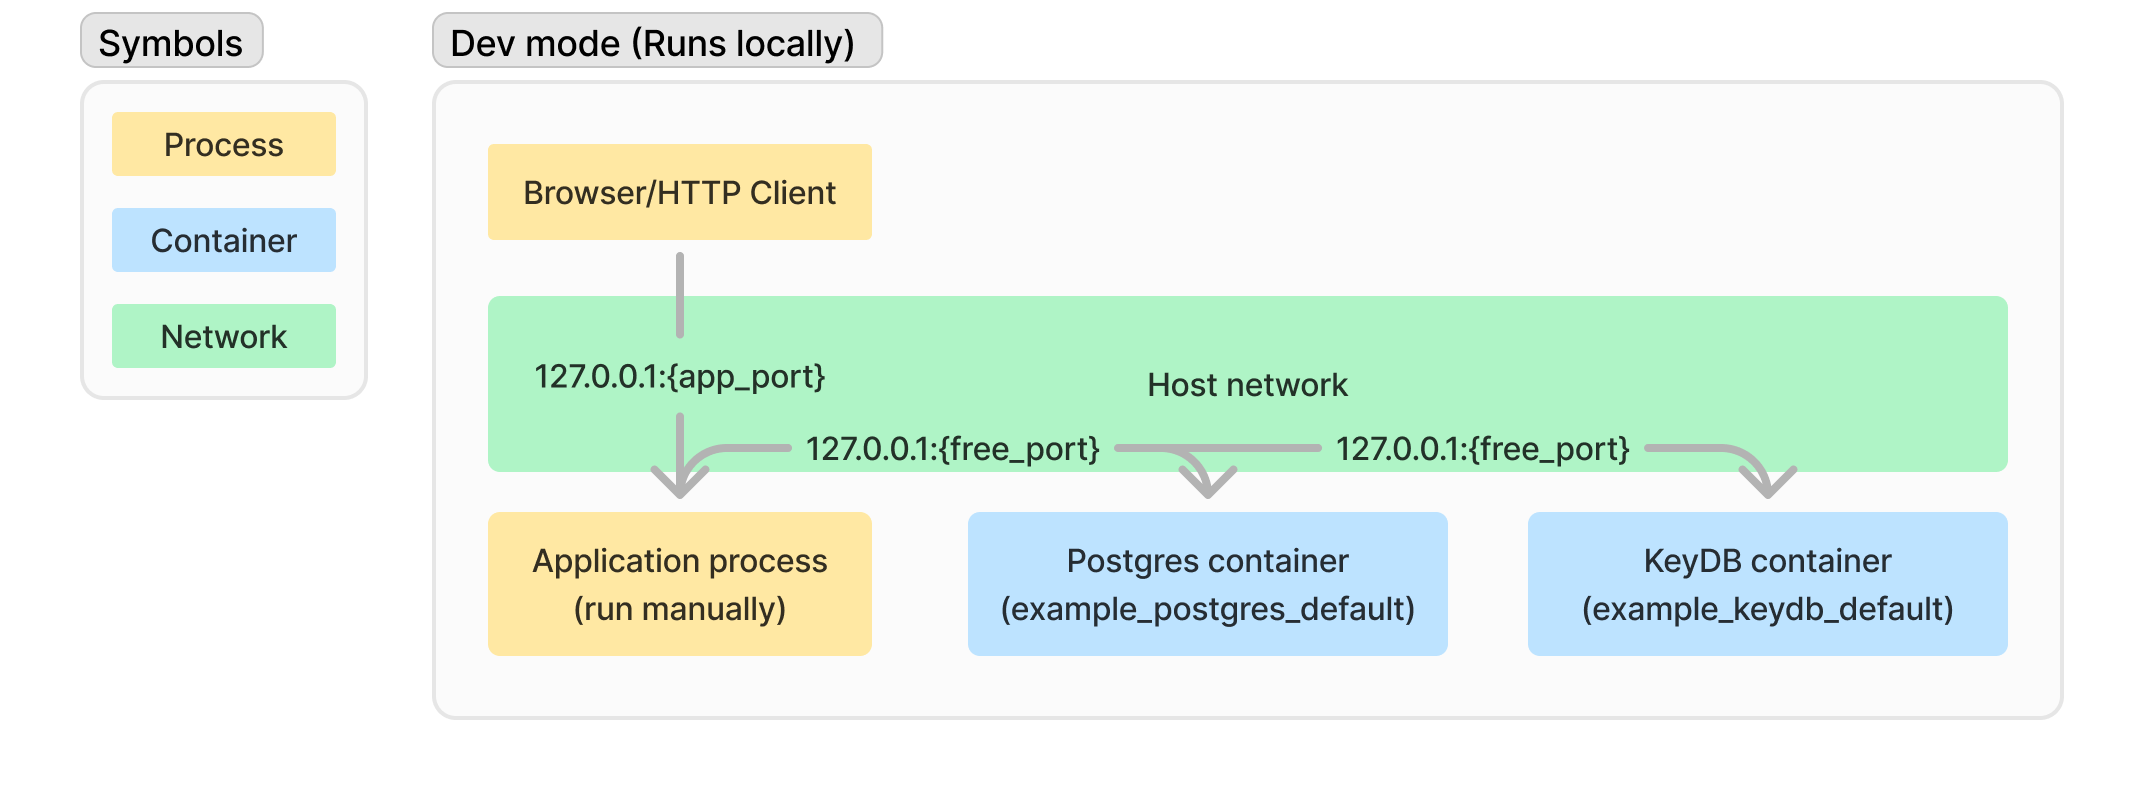
dploy devIn dev mode, dploy starts only the necessary dependencies (such as PostgreSQL) on your local machine. It also generates a .env file containing credentials for these dependencies, which you need to load manually.
The contents of the .env file will include:
APP_POSTGRES_URL=postgres://admin:admin@127.0.0.1:64525/postgres

# Your custom variables go below this line
APP_TELEGRAM_TOKEN=
There are two types of variables: automatically generated and custom. The APP_POSTGRES_URL is generated automatically, while you need to set APP_TELEGRAM_TOKEN yourself. After setting your custom variables, rerun dploy with dploy dev.
In dev mode, you must run your application manually, ensuring that the .env file is loaded. Networking uses the host network, with container ports exposed on random free ports (e.g., port 64525 in APP_POSTGRES_URL).
To stop the services, run:
dploy dev stoprun Mode
To activate run mode, run:
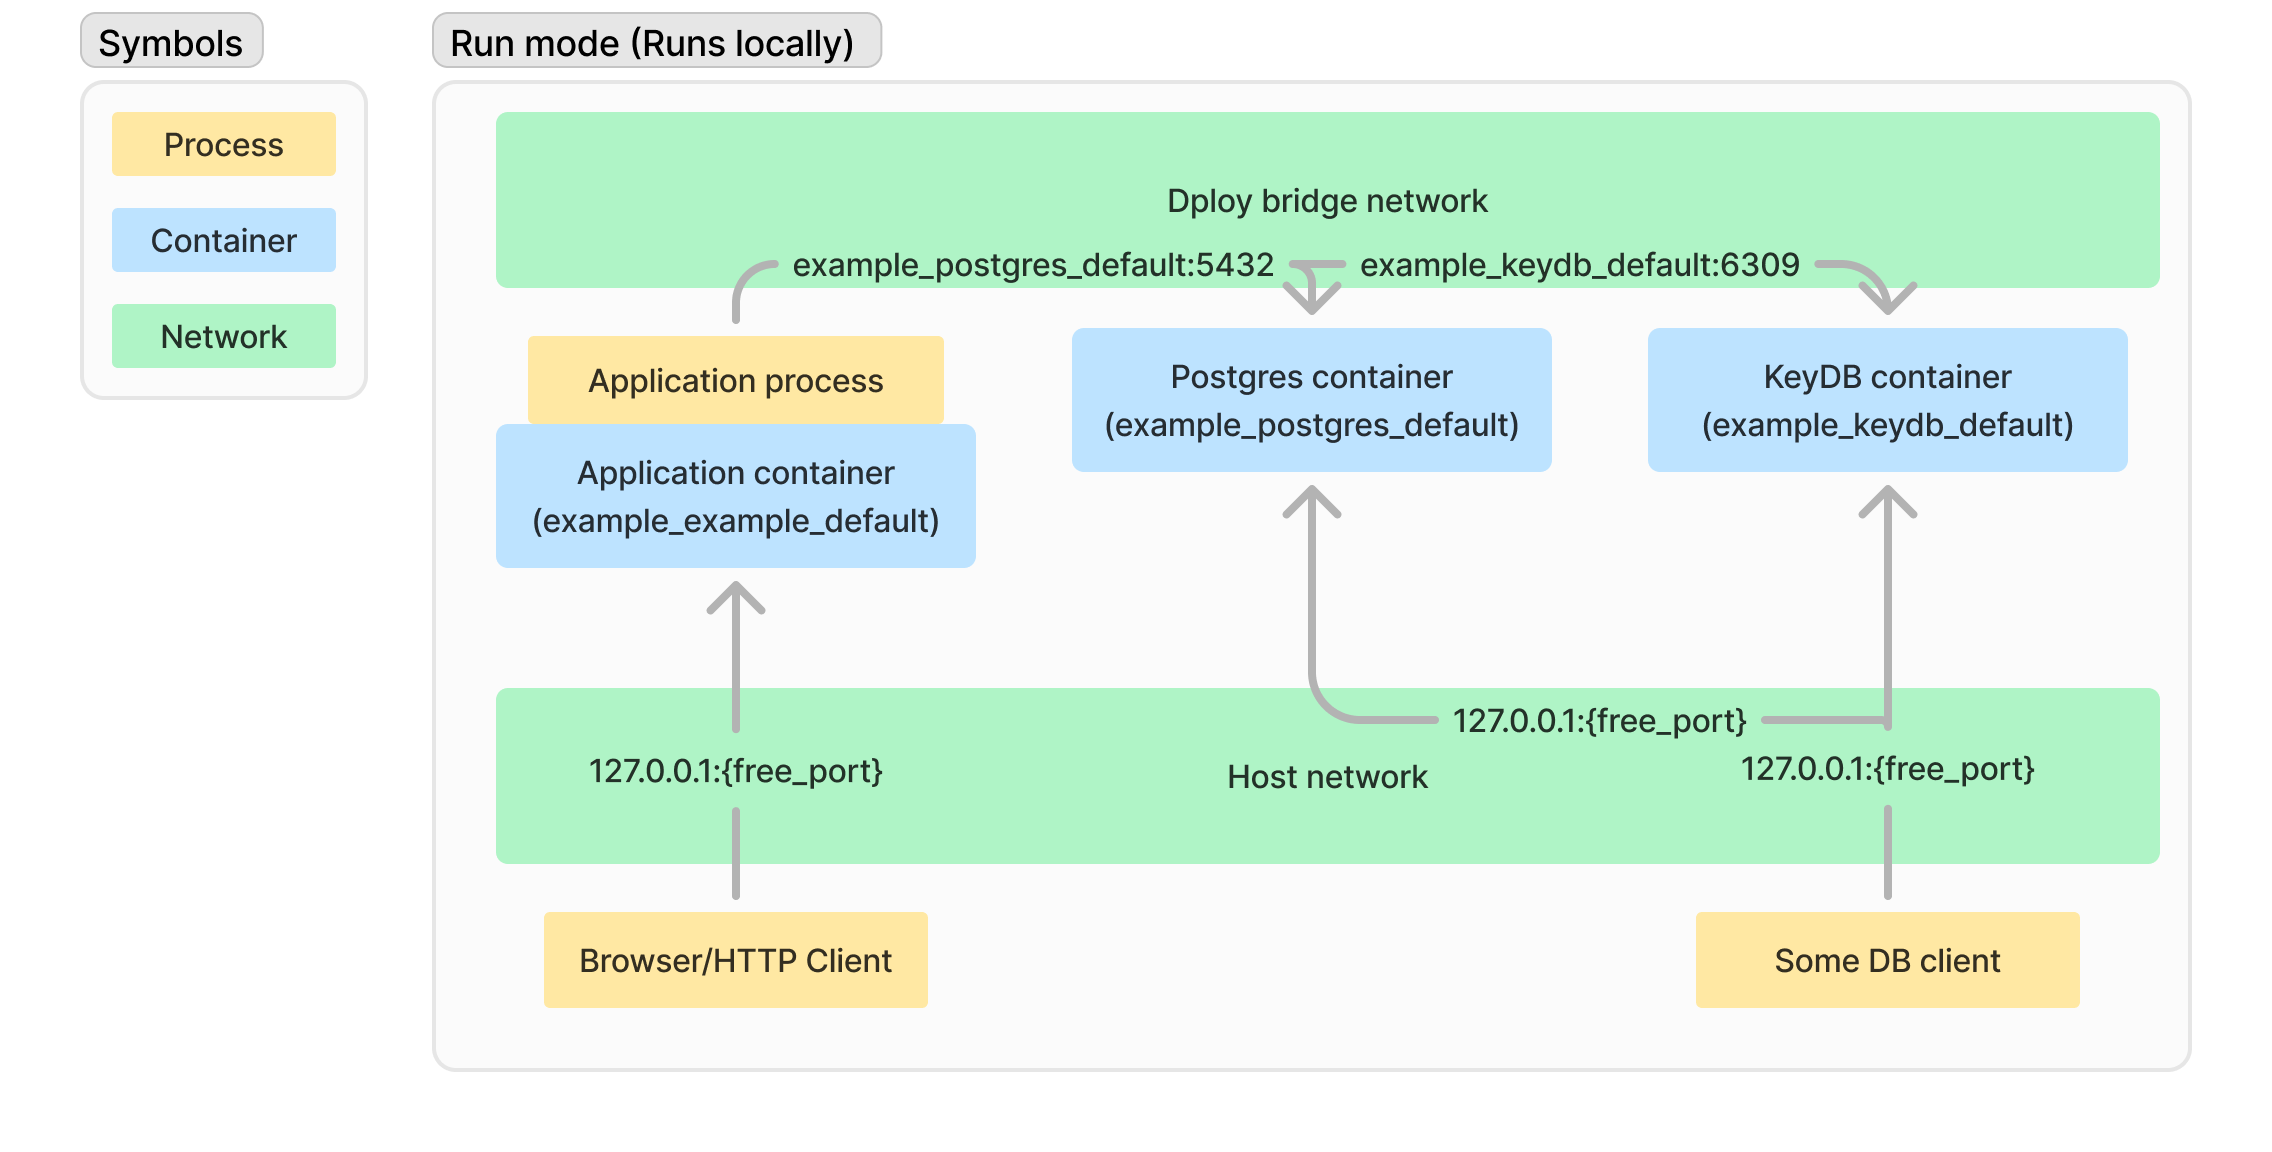
dploy runIn run mode, dploy starts both your application and its dependencies on your local machine. Like dev mode, it generates a .env file with the necessary credentials.
Your application is built using the Dockerfile and then automatically started. In this mode, dploy handles the loading of the .env file and sets the variables inside the application container.
Networking in run mode works similarly to dev mode, with container ports exposed on random free ports. However, all containers use the bridge network internally. In the .env file, you'll notice that the APP_POSTGRES_URL variable's host is set to project_postgres_default. Additionally, this bridge network is shared among all projects using dploy, allowing you to develop microservices easily.
Essentially, run mode combines the features of both dev and deploy modes, offering the convenience of local development with the structure of remote deployment.
To stop the services, run:
dploy run stopdeploy Mode
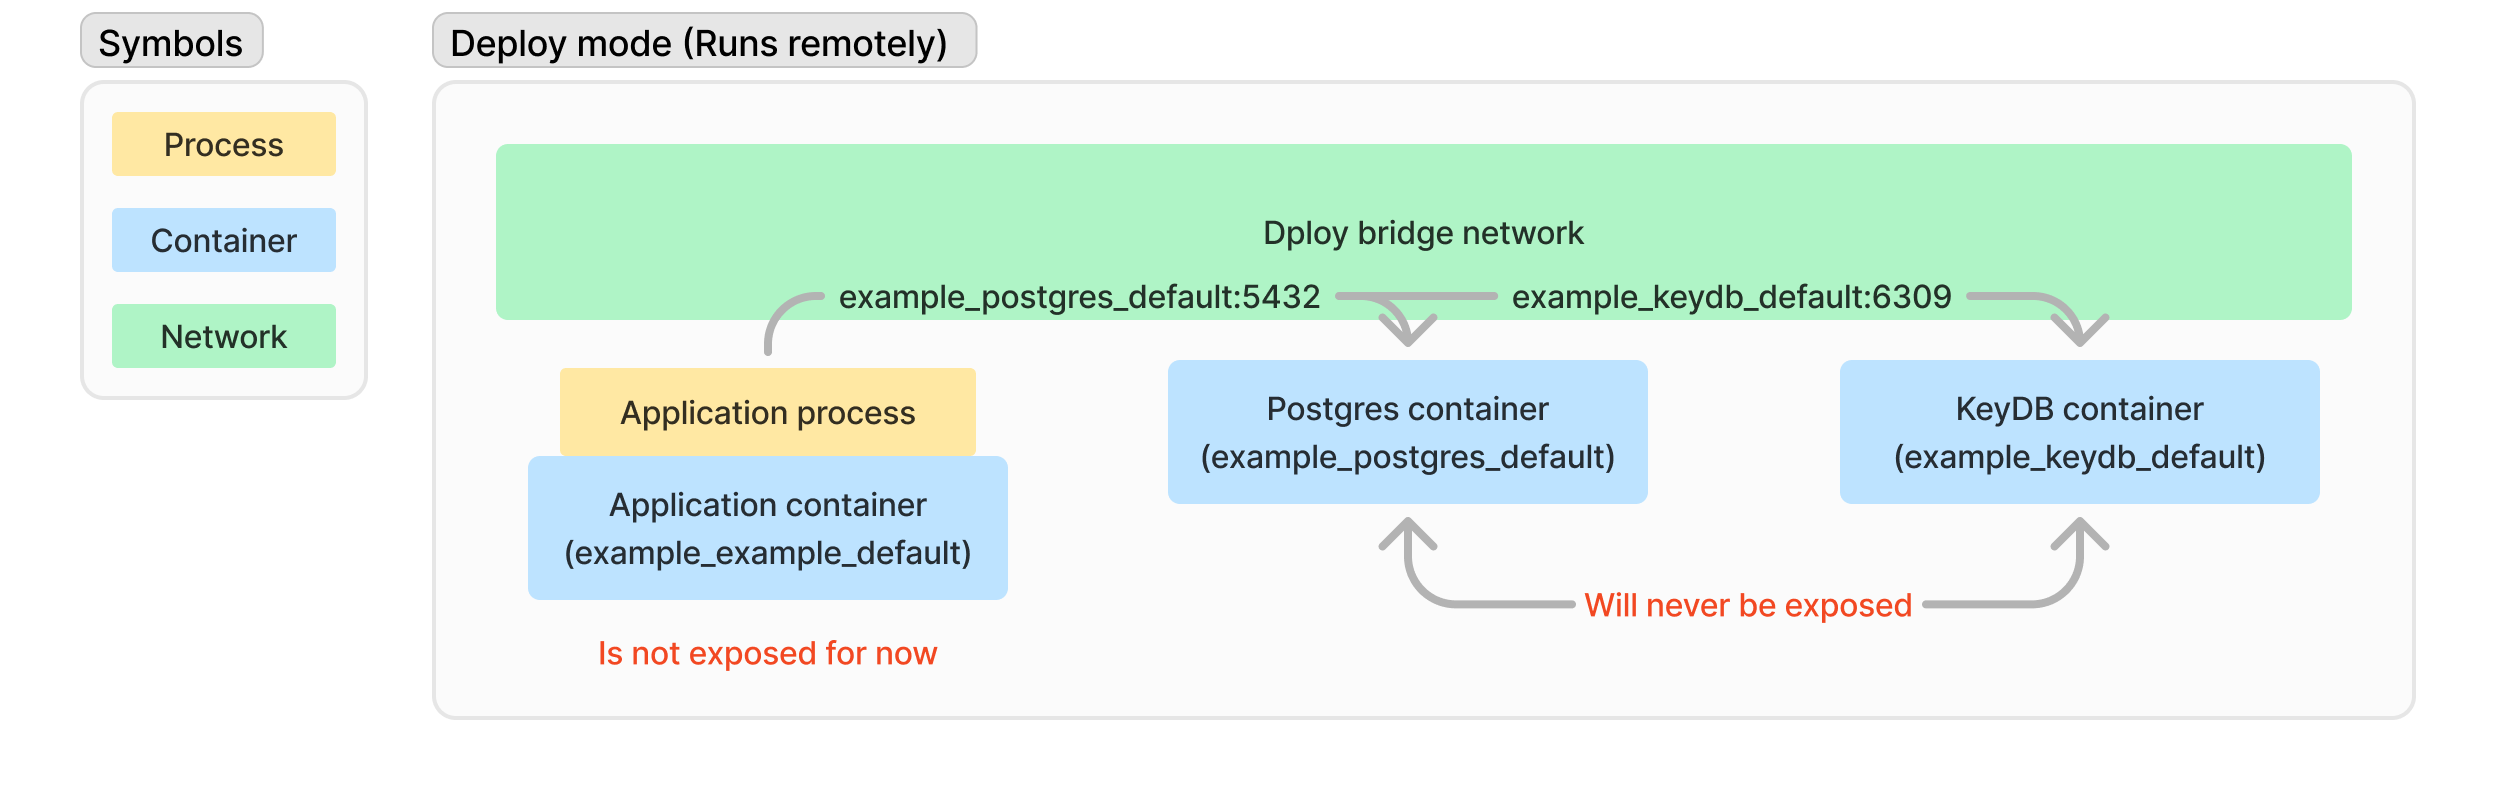
In deploy mode, dploy starts both your application and its dependencies on a specified remote server. To deploy, use the following command:
dploy deploy <host> -p <port> -u <user> -k <path_to_keyfile>The flags are:
-p: SSH server port (default is 22).-u: SSH server username (default isroot).-k: Path to the key file.
In deploy mode, the .env file is not generated. Instead, dploy uses environment variables specified in your system or a manually created .env file. This mode is intended for use in CI environments. Dependencies variables are set automatically inside the application container.
All networking is handled through dploy's bridge network, and dependency container ports are not exposed. Currently, application container ports are also not exposed.
To stop the services, run:
dploy deploy <host> stopDifferences Summary
The table below highlights the differences between the three modes:
| Feature | dev | run | deploy |
|---|---|---|---|
| Use case | Debugging in an IDE | Running or testing locally | Deploying to production |
| Application startup | Manual | Automatic (built from Dockerfile) | Automatic (built from Dockerfile) |
| .env generation | Yes (don't forget to load .env manually) | Yes | No |
| Networking | Host | Host + Bridge | Bridge |
| Port exposure | Random | Random | No |